Customized Analyses
One of Pyneal's most powerful features is its ability to run customized analyses during a real-time scan. This means you can design your own analyses to fit your unique experimental needs, and Pyneal will execute those analyses on every new timepoint and store the results.
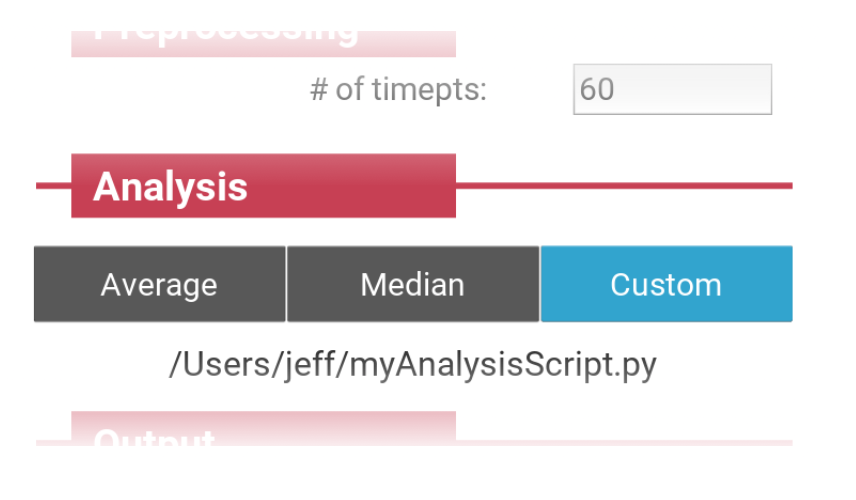
To take advantage of this feature, you write a custom analysis script (in python), and select the Custom button in the Analysis pane of the GUI:
Custom Analysis Script
While custom analyses offer a lot of flexibility, there are a couple of important constraints that need to be included in the script to ensure it can be integrated into the typical Pyneal data flow.
The best way to ensure these constraints are met is to base your script off of the template file included with Pyneal. You can find this template in
pyneal/utils/customAnalyses/customAnalysisTemplate.py
Or, you can simply copy the text here:
import sys
import os
from os.path import join
import logging

import numpy as np
import nibabel as nib


class CustomAnalysis:
    """ Custom Analysis Module

    This class contains all of the methods needed for setting up and executing
    customized analyses in Pyneal during a real-time scan

    """
    def __init__(self, maskFile, weightMask, numTimepts):
        """ Initialize the class

        Everything in the `__init__` method will be executed BEFORE the scan
        begins. This is a place to run any necessary setup code.

        The `__init__` method provides a number of inputs from the setup GUI
        that can be used to help set up a customized analyses. You are free to
        use or ignore these inputs as needed.

        Parameters
        ----------
        maskFile : string
            full path to the mask file specified in the Pyneal setup GUI
        weightMask : boolean
            flag indicating whether the "weight mask?" option in setup GUI was
            checked.
        numTimepts : int
            number of timepts in the run, as specified in the setup GUI

        """
        # Load masks and weights, and create an within-class reference to
        # each for use in later methods.
        mask_img = nib.load(maskFile)
        if weightMask is True:
            self.weights = mask_img.get_data().copy()
        self.mask = mask_img.get_data() > 0  # 3D boolean array of mask voxels

        # within-class reference to numTimepts for use in later methods
        self.numTimepts = numTimepts

        # Add the directory that this script lives in to the path. This way it
        # is easy to load any additional files you want to put in the same
        # directory as your custom analysis script
        self.customAnalysisDir = os.path.abspath(os.path.dirname(__file__))
        sys.path.append(self.customAnalysisDir)

        # Import the logger. If desired, you can write log messages to the
        # Pyneal log file using:
        # self.logger.info('my log message') - log file and stdOut
        # self.logger.debug('my log message') - log file only
        self.logger = logging.getLogger('PynealLog')

        ########################################################################
        ############# vvv INSERT USER-SPECIFIED CODE BELOW vvv #################
        self.myResult = 1


        ############# ^^^ END USER-SPECIFIED CODE ^^^ ##########################
        ########################################################################

    def compute(self, vol, volIdx):
        """ Compute method

        This method will be executed on EACH new 3D volume that arrives
        DURING the real-time scan. Results must be returned in a dictionary. No
        restrictions on dict key names or values, but note that the volume
        index will get added automatically by Pyneal before the result gets
        placed on the results server, so no need to specify that here

        Parameters
        ----------
        vol : numpy-array
            3D array of voxel data for the current volume
        volIdx : int
            0-based index indicating where, in time (4th dimension), the volume
            belongs

        Returns
        -------
        dict
            dictionary containing key:value pair(s) for the results for the
            current volume

        """
        ########################################################################
        ############# vvv INSERT USER-SPECIFIED CODE BELOW vvv #################
        self.myResult += 1


        ############# ^^^ END USER-SPECIFIED CODE ^^^ ##########################
        ########################################################################

        return {'result': self.myResult}
The script class consists of a single class (CustomAnalysis) with two methods: __init__ and compute. You are welcome to include any additional methods that are useful, just make sure these two methods exist. See below for details on what each method does and how to customize them.
__init__ (initialize)
The __init__ method is called as soon as you hit submit on the setup GUI. In other words, the code in this method runs before the scan begins. Thus, the __init__ method is where you will specify any set up code that needs to be initialized before the scan begins (e.g. loading multiple mask files).
Let's take a look at the code in more detail:
def __init__(self, maskFile, weightMask, numTimepts):
    """ Initialize the class

    Everything in the `__init__` method will be executed BEFORE the scan
    begins. This is a place to run any necessary setup code.

    The `__init__` method provides a number of inputs from the setup GUI
    that can be used to help set up a customized analyses. You are free to
    use or ignore these inputs as needed.

    Parameters
    ----------
    maskFile : string
        full path to the mask file specified in the Pyneal setup GUI
    weightMask : boolean
        flag indicating whether the "weight mask?" option in setup GUI was
        checked.
    numTimepts : int
        number of timepts in the run, as specified in the setup GUI

    """
    # Load masks and weights, and create an within-class reference to
    # each for use in later methods.
    mask_img = nib.load(maskFile)
    if weightMask is True:
        self.weights = mask_img.get_data().copy()
    self.mask = mask_img.get_data() > 0  # 3D boolean array of mask voxels

    # within-class reference to numTimepts for use in later methods
    self.numTimepts = numTimepts

    # Add the directory that this script lives in to the path. This way it
    # is easy to load any additional files you want to put in the same
    # directory as your custom analysis script
    self.customAnalysisDir = os.path.abspath(os.path.dirname(__file__))
    sys.path.append(self.customAnalysisDir)

    # Import the logger. If desired, you can write log messages to the
    # Pyneal log file using:
    # self.logger.info('my log message') - log file and stdOut
    # self.logger.debug('my log message') - log file only
    self.logger = logging.getLogger('PynealLog')

    ########################################################################
    ############# vvv INSERT USER-SPECIFIED CODE BELOW vvv #################
    self.myResult = 1


    ############# ^^^ END USER-SPECIFIED CODE ^^^ ##########################
    ########################################################################
Preset variables, and creating new ones
First, note that certain settings from the setup GUI are passed into the custom analysis script. Namely:
maskFile: the path to the mask specified in the GUIweightMask: a True/False boolean flag indicating whether theweight mask?option was checked or not.numTimepts: the number of timepts in the run, as specified in the GUI.
At the top of the __init__ method, you'll see some code that reads in each of those settings, and creates local variables for each:
# Load masks and weights, and create an within-class reference to
# each for use in later methods.
mask_img = nib.load(maskFile)
if weightMask == True:
    self.weights = mask_img.get_data().copy()
self.mask = mask_img.get_data() > 0  # 3D boolean array of mask voxels

# within-class reference to numTimepts for use in later methods
self.numTimepts = numTimepts
This enables you to reference these variables in any other method by referring to self.mask, self.weights, and self.numTimepts. In fact, the same thing is true for any variable you create in the __init__ method; in order to access the variable in other methods, you must prepend the variable name with self.
The __init__ method also contains a couple of other useful tidbits near the top. First, we add the directory that contains your custom analysis script to the path. This way, you can easily load any additional files that are exist in that same directory.
# Add the directory that this script lives in to the path. This way it
# is easy to load any additional files you want to put in the same
# directory as your custom analysis script
self.customAnalysisDir = os.path.abspath(os.path.dirname(__file__))
sys.path.append(self.customAnalysisDir)
Adding log messages
It also creates a reference to the logger, which is the tool that adds new messages to the pynealLog.log output file. You can use this reference anywhere in your script to add new log messages, which will be automatically timestamped and included in the output file. You can even control the type of log message
- info messages will get written to the output file AND appear in the stdOut of the terminal
- debug messages will only get written to the output file
# Import the logger. If desired, you can write log messages to the
# Pyneal log file using:
# self.logger.info('my log message') - log file and stdOut
# self.logger.debug('my log message') - log file only
self.logger = logging.getLogger('PynealLog')
User-specified __init__ code
Finally, at the bottom of the __init__ method is space for you to include any additional code that is needed.
########################################################################
############# vvv INSERT USER-SPECIFIED CODE BELOW vvv #################
self.myResult = 1


############# ^^^ END USER-SPECIFIED CODE ^^^ ##########################
########################################################################
In order to illustrate, in the example above we're simply creating a new variable (self.myResult) and assigning it a value of 1.
compute
The compute method is what actually gets called during a scan. In fact, it gets called each time a new 3D volume appears from the scanner. Here's the code in more detail:
def compute(self, vol, volIdx):
    """ Compute method

    This method will be executed on EACH new 3D volume that arrives
    DURING the real-time scan. Results must be returned in a dictionary. No
    restrictions on dict key names or values, but note that the volume
    index will get added automatically by Pyneal before the result gets
    placed on the results server, so no need to specify that here

    Parameters
    ----------
    vol : numpy-array
        3D array of voxel data for the current volume
    volIdx : int
        0-based index indicating where, in time (4th dimension), the volume
        belongs

    Returns
    -------
    dict
        dictionary containing key:value pair(s) for the results for the
        current volume

    """
    ########################################################################
    ############# vvv INSERT USER-SPECIFIED CODE BELOW vvv #################
    self.myResult += 1


    ############# ^^^ END USER-SPECIFIED CODE ^^^ ##########################
    ########################################################################

    return {'result': self.myResult}
Note that the compute method passes in references to the current volume (3D numpy array, [x,y,z]), as well as the volIdx, an integer representing the current volume index (in 4th dimension; 0-based index).
User-specified compute code
The compute method includes space for you to insert your own analysis code:
########################################################################
############# vvv INSERT USER-SPECIFIED CODE BELOW vvv #################
self.myResult += 1


############# ^^^ END USER-SPECIFIED CODE ^^^ ##########################
########################################################################
You can use this area to write customized analysis code that will be executed on each volume. In the simple example above, each time a new volume arrives, the compute method will increment the self.myResult variable (created in the __init__ method) by 1.
Storing results
The compute method must return a python dictionary containing the analysis result (or results) for the current volume.
return {'result': self.myResult}
That said, you are free to customize the contents of this dictionary as needed to fit your experimental needs. For instance, if you are calculating the mean signal in multiple ROIs (and storing those value in variables named roi1_meanSignal, roi2_meanSignal, and roi3_meanSignal) your dictionary could look something like this:
{'roi1_mean': roi1_meanSignal,
'roi2_mean`: roi2_meanSignal,
'roi3_mean`: roi3_meanSignal}
Pyneal automatically tacks on the current volIdx as an entry to the dictionary later on, so no need to include that information here.